Aligning Partner Dots
 In order to align the dots you must select the Move Dots tool as shown here. This tool allows you to click and drag dots around in any of the
picture windows.
In order to align the dots you must select the Move Dots tool as shown here. This tool allows you to click and drag dots around in any of the
picture windows.
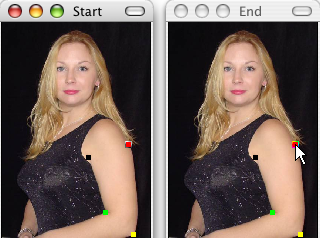 We want to
adjust the dots in the picture window labeled End until they represent how you want the last frame of your warp animation to look.
When you hover over a dot, you should notice that it glows with a colorful outline, and its partner dot glows with a black and white outline.
Simply click on the dot, hold the mouse button down, drag the dot to a new location, and then release the mouse button.
We want to
adjust the dots in the picture window labeled End until they represent how you want the last frame of your warp animation to look.
When you hover over a dot, you should notice that it glows with a colorful outline, and its partner dot glows with a black and white outline.
Simply click on the dot, hold the mouse button down, drag the dot to a new location, and then release the mouse button.
 Here we have moved the red dot
inward somewhat in order to make the arm appear smaller. Notice that the ending picture updates itself automatically as you move the dot, to show
you what the final frame of your warp will look like.
Here we have moved the red dot
inward somewhat in order to make the arm appear smaller. Notice that the ending picture updates itself automatically as you move the dot, to show
you what the final frame of your warp will look like.
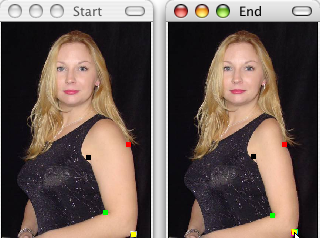 Move the other three dots in the same fashion as the first one. You can see here how we
adjusted all of the dots to try to keep the same relative shape of the arm while making it smaller.
Move the other three dots in the same fashion as the first one. You can see here how we
adjusted all of the dots to try to keep the same relative shape of the arm while making it smaller.