The primary use for Morpheus Photo Compressor is to easily compress your pictures so you can email photos of any size.
Start by loading any picture into the program, then simply adjust the two slider bars

 to change the image size and quality setting. You will instantly see what the image will look like with
those settings without any hassle of having to save and re-open the picture file. Helpful toolbars
to change the image size and quality setting. You will instantly see what the image will look like with
those settings without any hassle of having to save and re-open the picture file. Helpful toolbars

 show you how big the file will be and how long it would take to download or email at the current settings.
You can save a copy of the picture to disk at any time with the current size and quality settings, or even
send the picture directly to a new email without having to save it. Never waste time emailing large
pictures from your digital camera again!
show you how big the file will be and how long it would take to download or email at the current settings.
You can save a copy of the picture to disk at any time with the current size and quality settings, or even
send the picture directly to a new email without having to save it. Never waste time emailing large
pictures from your digital camera again!
For a more complete and detailed walkthrough of the basic operation of Morpheus Photo Compressor, please see
the tutorial.

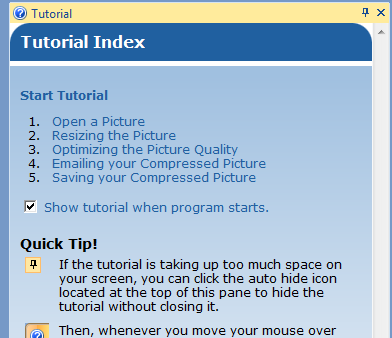
 Important tip about this help page: Many images are just thumbnails. When you move your mouse over these thumbnails and see the Enlarge arrow, simply
click the picture to display the full size image. Click the full size image to shrink it back to the thumbnail in order to read the text underneath it.
Important tip about this help page: Many images are just thumbnails. When you move your mouse over these thumbnails and see the Enlarge arrow, simply
click the picture to display the full size image. Click the full size image to shrink it back to the thumbnail in order to read the text underneath it.
[top]

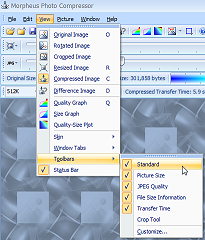
 There are five toolbars, located just under the Menu Bar, which contain helpful buttons and informative text.
From top to bottom there is the Standard toolbar, the Picture Size toolbar, the JPEG Quality toolbar, File Size Information
toolbar, and Transfer Time toolbar.
There are five toolbars, located just under the Menu Bar, which contain helpful buttons and informative text.
From top to bottom there is the Standard toolbar, the Picture Size toolbar, the JPEG Quality toolbar, File Size Information
toolbar, and Transfer Time toolbar.
 Don't let the size of the toolbars fool you, their usage is quite simple.
A lot of space is used for the sliders and also for text that simply provides information about the picture you are
currently optimizing. If you do not want to see all of the toolbars, you can hide any or all of them. The same functionality
is always available from the menu options, and you can always reshow the toolbar later. Simply select View on the Menu Bar, then
Toolbars, and then the name of the toolbar you want to show or hide.
Don't let the size of the toolbars fool you, their usage is quite simple.
A lot of space is used for the sliders and also for text that simply provides information about the picture you are
currently optimizing. If you do not want to see all of the toolbars, you can hide any or all of them. The same functionality
is always available from the menu options, and you can always reshow the toolbar later. Simply select View on the Menu Bar, then
Toolbars, and then the name of the toolbar you want to show or hide.
[top]
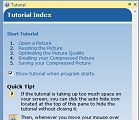
 The in-program help system contains the same help information that is available online, only it appears in a docking pane
that is by default docked to the right side of the window.
The in-program help system contains the same help information that is available online, only it appears in a docking pane
that is by default docked to the right side of the window.
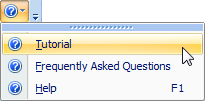 You can show a help pane by selecting it from the help icon on the Standard Toolbar.
These panes can be resized by dragging the edge,
You can show a help pane by selecting it from the help icon on the Standard Toolbar.
These panes can be resized by dragging the edge,
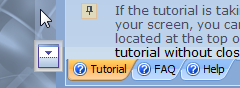
 or set to auto-hide or be closed using the two buttons in their top right corner
 .
You can move the panes around by dragging the title bar
.
You can move the panes around by dragging the title bar

 or tab

 of the panes. The panes can be docked to any side of the window, or left
floating above the entire program; however you would like to use them.
of the panes. The panes can be docked to any side of the window, or left
floating above the entire program; however you would like to use them.
[top]
The Standard Toolbar contains buttons to open, close, and save pictures
 ,
apply settings to pictures
,
apply settings to pictures
 ,
change the image view
,
change the image view
 ,
draw graphs
,
draw graphs
 ,
rotate and crop
,
rotate and crop
 ,
and open help panes
,
and open help panes
 .
.
 The save button lets you save a copy of the current picture. Morpheus Photo Compressor does not
save over your original picture because the compressed picture may be smaller and thus not suitable
for printing. You will likely want to keep the original picture around if you ever want a print quality
image. Compressed picture files are great for web sites, emailing and sharing with friends.
The save button lets you save a copy of the current picture. Morpheus Photo Compressor does not
save over your original picture because the compressed picture may be smaller and thus not suitable
for printing. You will likely want to keep the original picture around if you ever want a print quality
image. Compressed picture files are great for web sites, emailing and sharing with friends.
Each of the sections of buttons on the Standard Toolbar are explained below in detail, in their own help sections. Help panes are explained above.
[top]

 The Picture Size toolbar contains a slider bar and a text box,
either of which can be used to size the image anywhere from 1% to 100% of the original size.
Alternatively, it is possible to enter a specific width or height
The Picture Size toolbar contains a slider bar and a text box,
either of which can be used to size the image anywhere from 1% to 100% of the original size.
Alternatively, it is possible to enter a specific width or height
 for the image, instead of just scaling from 1% to 100%. The label shows the current size in pixels
 .
On the left side of the toolbar is the Resize Method option
.
On the left side of the toolbar is the Resize Method option
 ,
which controls how the picture is resized.
,
which controls how the picture is resized.
Lower size settings will result in smaller files and shorter download or email times, but too low of a size setting
results in an image too small to see. Higher size settings will result in larger images, but also larger files and
longer download times. To high of an image size can also result in an image that some people may only be able to see
the upper-left corner of. Pick the image size that best fills your screen without going over the edges and causing
the scrollbars to appear.
The original aspect ratio of the image is always maintained when sizing the image. This means that changing the width or
height text boxes will automatically update the opposite one with the appropriate value such that the image will never appear
stretched one way or the other.
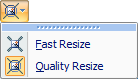 The Resize Method option lets you choose between Fast Resize, and the default Quality Reisze method.
Quality Resize is better looking, but somewhat slower for large images. If the size setting is at 100 still, no resizing is done to the image.
If you plan to find the best size for your image, and it is particularly large, you may want to use Fast Resize until you settle
on the best size, since it can take a longer time to preview the resize using the Quality Resize method. The Quality Resize method can
typically reduce the file size of JPEGs as well, so remember to switch back to it once you find the size you want.
The Resize Method option lets you choose between Fast Resize, and the default Quality Reisze method.
Quality Resize is better looking, but somewhat slower for large images. If the size setting is at 100 still, no resizing is done to the image.
If you plan to find the best size for your image, and it is particularly large, you may want to use Fast Resize until you settle
on the best size, since it can take a longer time to preview the resize using the Quality Resize method. The Quality Resize method can
typically reduce the file size of JPEGs as well, so remember to switch back to it once you find the size you want.
 Resizing images can take a small amount of time, and the larger the image, the longer it takes. There is a
status bar at the bottom of the screen that will notify you when a new image setting is being calculated. Adjusting
the Image Size from 100, to say, 90, will result in the slider bar and text box reading 90, since that is the current
requested size setting. The status bar will then display a message such as "Calculating: Quality Image Size 2938x2203".
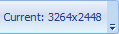
When the calculation is complete and the new image is ready a short moment later, the label on the toolbar will change to
read "Current: 2938x2203" and the image you are looking at will change to show what it looks like with the new 90% image
size. In this example, the picture loaded started out as 3264x2448 pixels, and 90% of that is 2938x2203.
Resizing images can take a small amount of time, and the larger the image, the longer it takes. There is a
status bar at the bottom of the screen that will notify you when a new image setting is being calculated. Adjusting
the Image Size from 100, to say, 90, will result in the slider bar and text box reading 90, since that is the current
requested size setting. The status bar will then display a message such as "Calculating: Quality Image Size 2938x2203".
When the calculation is complete and the new image is ready a short moment later, the label on the toolbar will change to
read "Current: 2938x2203" and the image you are looking at will change to show what it looks like with the new 90% image
size. In this example, the picture loaded started out as 3264x2448 pixels, and 90% of that is 2938x2203.
[top]

 The JPEG Quality toolbar contains a slider bar and a text box,
either of which can be used to set the JPEG quality setting anywhere from 1 to 100. There is also a display label
The JPEG Quality toolbar contains a slider bar and a text box,
either of which can be used to set the JPEG quality setting anywhere from 1 to 100. There is also a display label
 ,
which shows the current quality setting. On the left side of the toolbar is the Image Format option
,
which shows the current quality setting. On the left side of the toolbar is the Image Format option
 ,
which controls what type of image file to use when recompressing the picture.
,
which controls what type of image file to use when recompressing the picture.
Lower quality settings will result in smaller files and shorter download or email times, but too low of a quality
setting results in a very poor looking image. Higher quality settings will result in a much better looking picture,
but too high of a quality setting results in wasted space and time. Pick the lowest quality setting you can without
sacrificing too much appearance in order to achieve the best file size and download time.
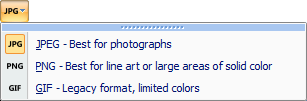 The Image Format option lets you choose between three file formats. The defalt, and one you will want to use most of the
time, is JPEG. You can also select from PNG or GIF. These other formats will disable the JPEG Quality options, since there is no
quality setting for PNGs or GIFs. Depending on the type of image you are working with, there may be occasions when a PNG or GIF
will produce a smaller file size, but typically JPEG is best for any photo pictures. PNGs will always have a perfect quality
representation of the picture, but almost always will waste a very large amount of space compared to JPEGs for photographs.
PNG is best suited for line art and pictures with large areas of solid colors. GIFs are low quality images which are limited to 256 colors,
so even if the file size is slightly better than JPEG, the quality may be worse with GIF.
The Image Format option lets you choose between three file formats. The defalt, and one you will want to use most of the
time, is JPEG. You can also select from PNG or GIF. These other formats will disable the JPEG Quality options, since there is no
quality setting for PNGs or GIFs. Depending on the type of image you are working with, there may be occasions when a PNG or GIF
will produce a smaller file size, but typically JPEG is best for any photo pictures. PNGs will always have a perfect quality
representation of the picture, but almost always will waste a very large amount of space compared to JPEGs for photographs.
PNG is best suited for line art and pictures with large areas of solid colors. GIFs are low quality images which are limited to 256 colors,
so even if the file size is slightly better than JPEG, the quality may be worse with GIF.
 Calculating JPEG images can take a small amount of time, and the larger the image, the longer it takes. There is a
status bar at the bottom of the screen that will notify you when a new image setting is being calculated. Adjusting
the JPEG quality from 50, to say, 60, will result in the slider bar and text box reading 60, since that is the current
requested quality setting. The status bar will then display a message such as "Calculating: 60% JPEG Quality".
When the calculation is complete and the new image is ready a short moment later, the label on the toolbar will change to
read "Current: 60" and the image you are looking at will change to show what it looks like with the new 60% quality
setting.
Calculating JPEG images can take a small amount of time, and the larger the image, the longer it takes. There is a
status bar at the bottom of the screen that will notify you when a new image setting is being calculated. Adjusting
the JPEG quality from 50, to say, 60, will result in the slider bar and text box reading 60, since that is the current
requested quality setting. The status bar will then display a message such as "Calculating: 60% JPEG Quality".
When the calculation is complete and the new image is ready a short moment later, the label on the toolbar will change to
read "Current: 60" and the image you are looking at will change to show what it looks like with the new 60% quality
setting.
The default JPEG Quality setting is 50 for every picture you open. This can be changed in the Preferences window available under the
Edit menu. Any value can be set so that all pictured opened will start with that value for their JPEG Quality instead.
[top]
The File Size Information toolbar does not contain any adjustable buttons or options. It is simply an informative toolbar
providing information about the file size and how similar the compressed picture is compared to the original image.
The first label
 will only change if you click on a different picture when you have more then one loaded. It will always
show the original file size of the image loaded and is not affected by any of the settings. The next label
will only change if you click on a different picture when you have more then one loaded. It will always
show the original file size of the image loaded and is not affected by any of the settings. The next label
 shows the size of the compressed image, which is affected by the combination of all of the picture settings.
The large colorful bar and the 3rd label

 show the relative size of the compressed image as compared to the original image.
The colors on the bar represent how much space and time you would save with the compressed image. If the bar is only into
the blue area, you are saving lots of space and making a significant reduction in the time needed to download or email
the compressed picture. As the bar approaches the green and yellow areas
show the relative size of the compressed image as compared to the original image.
The colors on the bar represent how much space and time you would save with the compressed image. If the bar is only into
the blue area, you are saving lots of space and making a significant reduction in the time needed to download or email
the compressed picture. As the bar approaches the green and yellow areas
 ,
you are saving less time and space. Once the bar reaches the red
,
you are saving less time and space. Once the bar reaches the red
 ,
you should consider whether the space savings are really worth it and maybe try to lower the quality or size settings to
save more space. The dark red area past the last tick mark
,
you should consider whether the space savings are really worth it and maybe try to lower the quality or size settings to
save more space. The dark red area past the last tick mark
 means the compressed image is actually larger than the original image. This is not a useful outcome and you will want to lower
some settings to decrease the file size.
means the compressed image is actually larger than the original image. This is not a useful outcome and you will want to lower
some settings to decrease the file size.
The last label
 tells how similar the image is to the original image before compression. Lower JPEG quality settings typically reduce the
image similarity. This value will likely never reach a perfect 100% due to the nature of JPEG compression, but the higher the
value the better. Keep in mind that higher JPEG quality settings used to raise the image similarity will also increase the
file size and the amount of time needed to download or email the image. Also, there is a point at which the image is so similar
that most people cannot tell the difference between the compressed image and the original.
tells how similar the image is to the original image before compression. Lower JPEG quality settings typically reduce the
image similarity. This value will likely never reach a perfect 100% due to the nature of JPEG compression, but the higher the
value the better. Keep in mind that higher JPEG quality settings used to raise the image similarity will also increase the
file size and the amount of time needed to download or email the image. Also, there is a point at which the image is so similar
that most people cannot tell the difference between the compressed image and the original.
[top]
The Transfer Time toolbar lets you estimate how long a picture would take to download or send by email. The toolbar also has buttons
to quickly email your compressed image(s) using your regular email software.
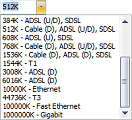
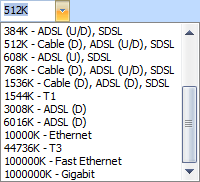 The Transfer Speed dropdown lets you pick the speed of your Internet connection, which is used to estimate the transfer
times for the pictures. You do not need to know the exact speed of your connection since this is an optional feature,
but the dropdown has many common speeds and technologies listed such as cable modems and ADSL to pick from. The (U) and (D)
next to some of the samples mean that speed only applies to Upstream speed (such as uploading, sending pictures, emailing
pictures) or Downstream speed (downloading, browsing the web, receiving emails). For example, it is quite common for a "56K"
dialup modem to be limited to 53K downstream and 33K upstream. It is important to remember that nearly every home Internet connection
has a much faster downstream speed than upstream. Many fast cable modems, for example, may be advertised with speeds of 10M (10000K) or
higher, but that is only the downstream speed. The upstream speed, which is what you will use when sending an email, may be only only a
tenth of the downstream speed, or lower. If you do not see your speed listed, you can also just type any value you want into the box instead.
The Transfer Speed dropdown lets you pick the speed of your Internet connection, which is used to estimate the transfer
times for the pictures. You do not need to know the exact speed of your connection since this is an optional feature,
but the dropdown has many common speeds and technologies listed such as cable modems and ADSL to pick from. The (U) and (D)
next to some of the samples mean that speed only applies to Upstream speed (such as uploading, sending pictures, emailing
pictures) or Downstream speed (downloading, browsing the web, receiving emails). For example, it is quite common for a "56K"
dialup modem to be limited to 53K downstream and 33K upstream. It is important to remember that nearly every home Internet connection
has a much faster downstream speed than upstream. Many fast cable modems, for example, may be advertised with speeds of 10M (10000K) or
higher, but that is only the downstream speed. The upstream speed, which is what you will use when sending an email, may be only only a
tenth of the downstream speed, or lower. If you do not see your speed listed, you can also just type any value you want into the box instead.

 The first two labels tell how long it would have taken to transfer the original picture, had you not used Morpheus Photo Compressor,
and then how long it will take to transfer the new compressed image. These time estimates are based on the current transfer speed selection.
Look at the Compressed Transfer Time to get an idea of how long you will have to wait to send an email with the current picture attached.
The first two labels tell how long it would have taken to transfer the original picture, had you not used Morpheus Photo Compressor,
and then how long it will take to transfer the new compressed image. These time estimates are based on the current transfer speed selection.
Look at the Compressed Transfer Time to get an idea of how long you will have to wait to send an email with the current picture attached.
The third label
 shows the relative speedup of the compressed transfer time compared to the original transfer time. The
higher the speedup the more time you are saving.
shows the relative speedup of the compressed transfer time compared to the original transfer time. The
higher the speedup the more time you are saving.
The Email Picture button
 lets you create a new email with the current picture attached in its compressed form, without having to save a copy of the
picture and then find it and attach it in your email program. The Email All Pictures
lets you create a new email with the current picture attached in its compressed form, without having to save a copy of the
picture and then find it and attach it in your email program. The Email All Pictures
 button will create a new email with all of the open pictures all attached in one email.
Both of these options require that you already have your email program installed and set up properly.
button will create a new email with all of the open pictures all attached in one email.
Both of these options require that you already have your email program installed and set up properly.
[top]
 The Apply Settings option lets you choose between having settings apply to each picture individually, or all pictures at once.
When you have multiple pictures open at once, you may want to have settings such as the JPEG Quality be the same for every picture, or
sometimes you may want a different JPEG Quality for every picture. By default, settings apply to pictures individually, so if you
change the quality for one picture from 50 to 60, then click on another picture window, it will still be set to 50. If you change the
Apply Settings option to apply to all pictures at once, then when you change the quality from 50 to 60, all open pictures will be
set to 60 at once.
The Apply Settings option lets you choose between having settings apply to each picture individually, or all pictures at once.
When you have multiple pictures open at once, you may want to have settings such as the JPEG Quality be the same for every picture, or
sometimes you may want a different JPEG Quality for every picture. By default, settings apply to pictures individually, so if you
change the quality for one picture from 50 to 60, then click on another picture window, it will still be set to 50. If you change the
Apply Settings option to apply to all pictures at once, then when you change the quality from 50 to 60, all open pictures will be
set to 60 at once.
Changing this option to All Pictures at Once will not retroactively change settings if several open pictures have already been set to
different settings. It will only affect the next time you change any of the picture settings, and only for the setting you change.
This option will effect what happens when you use any of the following settings:
- Rotate
- Crop (Both the Crop Tool and the four Crop setting boxes)
- Resize Method
- Size (Including the slider bar, and Width and Height settings)
- File Type
- Quality (Including the slider bar)
[top]
There are six different image views, all available on the Standard Toolbar. From left to right, they are the Original
 ,
Rotated
,
Rotated
 ,
Cropped
,
Cropped
 ,
Resized
,
Resized
 ,
Compressed
,
Compressed
 ,
and Difference Image
,
and Difference Image
 views. Each of the first five regular view modes show the image with different stages of settings have been applied.
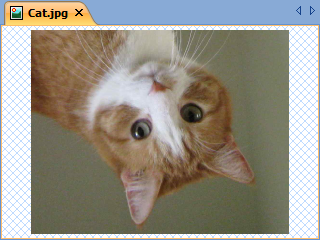
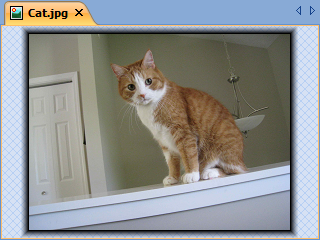
 View Original Image
will show the image as it was loaded without any settings affecting it. The image will be displayed in its
entire original size and you will likely have to scroll around to see everything. This is useful to compare what the image looks like
before and after all settings are applied.
View Original Image
will show the image as it was loaded without any settings affecting it. The image will be displayed in its
entire original size and you will likely have to scroll around to see everything. This is useful to compare what the image looks like
before and after all settings are applied.
Shown here is the sample which is included with the program, in its original form.
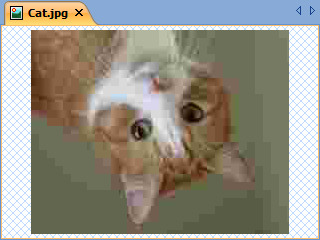
 View Rotated Image
shows the original image with only the rotation setting applied. The image is still the original size and uncompressed.
If the image is not rotated, this will appear exactly the same as the original image.
View Rotated Image
shows the original image with only the rotation setting applied. The image is still the original size and uncompressed.
If the image is not rotated, this will appear exactly the same as the original image.
The sample is rotated 180 degrees here, to illustrate the difference in the rotated image view.
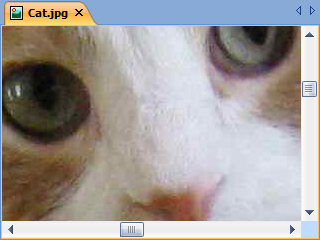
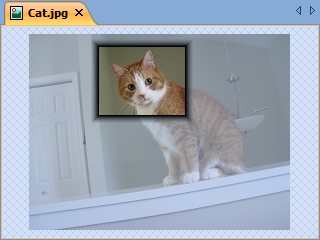
 View Cropped Image
will show only the area that you have selected with the crop tool. If you have not cropped any area, then the selected crop area is the entire image,
and this view will appear exactly the same as the rotated image view. The image may still be large and require scrolling, depending on how big of an area
you cropped.
View Cropped Image
will show only the area that you have selected with the crop tool. If you have not cropped any area, then the selected crop area is the entire image,
and this view will appear exactly the same as the rotated image view. The image may still be large and require scrolling, depending on how big of an area
you cropped.
The sample was cropped to just the face here, but still requires scrolling do to our small window.
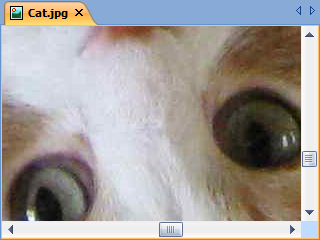
 View Resized Image
lets you see what the image looks like resized according to the picture size setting, but before any JPEG
compression is done. This is useful if the size setting is not set to 100% and you want to compare how the JPEG compression
affects the resized image. If the size setting is 100%, than this view will appear exactly the same as the cropped view.
View Resized Image
lets you see what the image looks like resized according to the picture size setting, but before any JPEG
compression is done. This is useful if the size setting is not set to 100% and you want to compare how the JPEG compression
affects the resized image. If the size setting is 100%, than this view will appear exactly the same as the cropped view.
Because of the small window size used in this sample, we had to go down to size 24% in order to get the full cropped and resized image to fit on our screen.
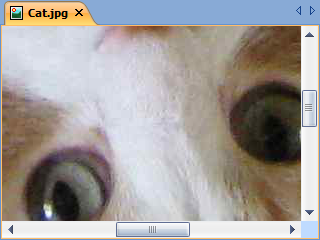
 View Compressed Image
is the default view which lets you view exactly how the image will look if were to be saved or emailed
using the current settings. This is the view you will use most of the time because all settings are applied in this view.
View Compressed Image
is the default view which lets you view exactly how the image will look if were to be saved or emailed
using the current settings. This is the view you will use most of the time because all settings are applied in this view.
The sample here has the quality setting at 10 to illustrate the JPEG blockiness at low quality settings.
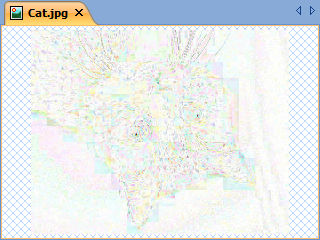 View Difference Image
is a special setting that will calculate the difference in the pixel colors between the compressed and the
original image after being resized. No difference in pixel color will be shown as white. The larger the difference is, the
brighter the color that will show. The difference image colors are exaggerated to help show where the differences are. So if the most
any pixel differs by is 2 (on a scale of 0 to 255) then the color values in the difference image will be 0, 128, or 255.
Increasing the JPEG quality setting will typically reduce the difference between the images and make the difference image become
more solid white.
View Difference Image
is a special setting that will calculate the difference in the pixel colors between the compressed and the
original image after being resized. No difference in pixel color will be shown as white. The larger the difference is, the
brighter the color that will show. The difference image colors are exaggerated to help show where the differences are. So if the most
any pixel differs by is 2 (on a scale of 0 to 255) then the color values in the difference image will be 0, 128, or 255.
Increasing the JPEG quality setting will typically reduce the difference between the images and make the difference image become
more solid white.
This is useful to help locate the slight defects caused by the JPEG compression at the current quality setting, since they
can be hard to see sometimes. This helps you know where to look when comparing the resized image with the compressed image,
in case you want to see exactly what pixels are different.
[top]
There are three different graphs you can draw to compare how various settings affect the compressed image. These graphs are the
Quality Graph
 ,
Size Graph
,
Size Graph
 ,
and Quality-Size Plot
,
and Quality-Size Plot
 .
Using the graphs is not required in order to compress your pictures, but
they can aid in locating good settings to use.
.
Using the graphs is not required in order to compress your pictures, but
they can aid in locating good settings to use.
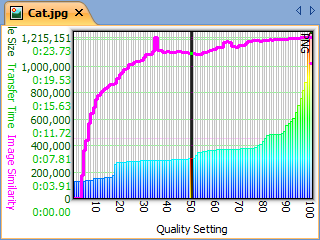 The Quality Graph lets you view how each of the 100 JPEG Quality settings affect the file size. Since the graph depends on the
picture rotation, crop, and size settings, changing any of these settings will produce a different graph. The graph shows vertical bars with
colors similar to the Relative Size Bar in the File Size Information toolbar. A magenta colored line graph is overlayed on the graph to show
how similar the compressed image is at each of the quality settings. The graph also includes markers to show where PNG and GIF are in
relation to the various JPEG Quality settings. It is typical that higher quality settings produce larger files and higher
similarity values, but this may not always be the case. Sometimes there are large jumps in the graph at a certain quality setting,
or other strange patterns you would only notice if you look at the graph.
The Quality Graph lets you view how each of the 100 JPEG Quality settings affect the file size. Since the graph depends on the
picture rotation, crop, and size settings, changing any of these settings will produce a different graph. The graph shows vertical bars with
colors similar to the Relative Size Bar in the File Size Information toolbar. A magenta colored line graph is overlayed on the graph to show
how similar the compressed image is at each of the quality settings. The graph also includes markers to show where PNG and GIF are in
relation to the various JPEG Quality settings. It is typical that higher quality settings produce larger files and higher
similarity values, but this may not always be the case. Sometimes there are large jumps in the graph at a certain quality setting,
or other strange patterns you would only notice if you look at the graph.
 The Size Graph is similar to the Quality Graph, except that it shows a vertical bar for each of the 100 size settings. Changing
the quality setting or other picture settingst will produce a different graph. This graph does not include the PNG and GIF markers since
selecting PNG or GIF will produce a graph for that specific image format showing each of the various size settings.
The Size Graph is similar to the Quality Graph, except that it shows a vertical bar for each of the 100 size settings. Changing
the quality setting or other picture settingst will produce a different graph. This graph does not include the PNG and GIF markers since
selecting PNG or GIF will produce a graph for that specific image format showing each of the various size settings.
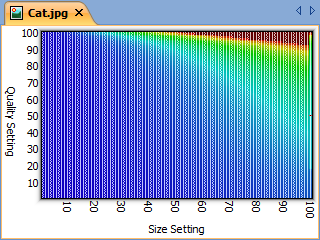 The Quality-Size Plot shows a colored box for every combination of quality and size setting available. The box color represents
the file size and can be thought of as the top color of the vertical bars from the previous two graphs. Changing the image format
does not affect the plot, but changing the resize method, rotation, or crop settings will produce a different plot, just as changing any of these
settings will produce a different graph for the previous two graphs. There is also no image similarity line graph overlayed on the plot like
there is on the other graphs.
The Quality-Size Plot shows a colored box for every combination of quality and size setting available. The box color represents
the file size and can be thought of as the top color of the vertical bars from the previous two graphs. Changing the image format
does not affect the plot, but changing the resize method, rotation, or crop settings will produce a different plot, just as changing any of these
settings will produce a different graph for the previous two graphs. There is also no image similarity line graph overlayed on the plot like
there is on the other graphs.
Graphs may take some time to draw, particularly the Quality-Size Plot, which must calculate 10,000 different possible settings.
Please be patient while the graphs are calculated.
[top]
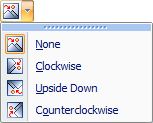 The Rotate button is available on the Standard Toolbar. Clicking the button will rotate the image 90 degrees to the right. Clicking the arrow
beside the button will display the Rotate menu where you can directly select the desired rotation.
The Rotate button is available on the Standard Toolbar. Clicking the button will rotate the image 90 degrees to the right. Clicking the arrow
beside the button will display the Rotate menu where you can directly select the desired rotation.
Rotating the image is optional, and will not make the file any smaller. This option is provided as a feature to correct for images taken with
digital cameras held at an angle.
[top]
 The Crop Tool button
 is located on the Standard Toolbar, just to the right of the Rotate button. Pressing this button will enter picture crop mode. In this mode, the original rotated image
is displayed using only the available window space. This means that it will be enlarged or shrunk down to fit on your screen, unlike most other views in Morpheus Photo Compressor, where
the picture is displayed in its exact size, using scrollbars if necessary.
is located on the Standard Toolbar, just to the right of the Rotate button. Pressing this button will enter picture crop mode. In this mode, the original rotated image
is displayed using only the available window space. This means that it will be enlarged or shrunk down to fit on your screen, unlike most other views in Morpheus Photo Compressor, where
the picture is displayed in its exact size, using scrollbars if necessary.
Also when in picture crop mode, you will see a black border around the picture, showing which parts of the image are inside or outside of the crop.
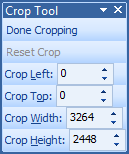 When in picture crop mode, the Crop Tool Toolbar will appear floating above the Morpheus Photo Compressor window. This toolbar allows for fine-tuning of the crop values, as well as a button
to exit crop mode when you are finished.
When in picture crop mode, the Crop Tool Toolbar will appear floating above the Morpheus Photo Compressor window. This toolbar allows for fine-tuning of the crop values, as well as a button
to exit crop mode when you are finished.
When you are finished cropping, press the Done Cropping button on the Crop Tool Toolbar to return to the previous view. If you do not wish to have any part of the picture
cropped out, press the Reset Crop button to expand the crop area over the entire picture.
 The black border can be dragged around using the mouse, to adjust the size of the area to be cropped. Clicking and dragging anywhere else outside the crop area will
discard the old crop border and begin a new one. Clicking and dragging inside the crop area will allow it to be moved around without resizing it.
The black border can be dragged around using the mouse, to adjust the size of the area to be cropped. Clicking and dragging anywhere else outside the crop area will
discard the old crop border and begin a new one. Clicking and dragging inside the crop area will allow it to be moved around without resizing it.
In Morpheus Photo Compressor, cropping is not a permanent process that will lose track of the area you cropped away. The area outside the black border that is shaded lighter will not be used
in your compressed picture, but you can always re-crop your image and enlarge the crop area if you change your mind.
[top]
The Email Picture button
lets you create a new email with the current picture attached in its compressed form, without having to save a copy of the
picture and then find it and attach it in your email program. The Email All Pictures button
will create a new email with all of the open pictures all attached in one email. The new emails only require that you
fill in the "To:" field before sending. No other extra steps are needed to email your compressed pictures.
The email picture features require that you use a mail program set up in windows which supports MAPI. Most common email
programs, such as Mozilla Thunderbird, Eudora, Outlook, or Windows Live Mail will work. Many types of webmail accounts will not work
with MAPI, although some have MAPI software you can download and run on your computer. If the wrong program is loaded when you click
on this button, then make sure the program you want to use thinks that it is the default mail program for Windows. You can change the
default mail program in Windows Control Panel under Internet Options in the Programs tab on Windows XP. On Windows 7, you can use the
Set default access and computer defaults option under the Default Programs choice in Control Panel. If your program is not listed as a choice
in Control Panel, it most likely does not support MAPI and you will have to save your pictures and attach them manually.
[top]
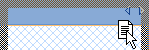
By default, all of the regular picture windows are always maximized and shown on a tab bar. The windows can be separated into
groups of tabs, and each group has left and right buttons
 to move through the tabs when many windows are open at once.
 The close button appears on the tab of any visible picture window.
 The window tabs can be clicked and dragged for reordering, or they can be dragged to other groups. Drag a tab to the edges of a group to split the
group in half, creating a new group.
The window tabs can be clicked and dragged for reordering, or they can be dragged to other groups. Drag a tab to the edges of a group to split the
group in half, creating a new group.
If you do not like the tab groups, and want the windows to have the familiar minimize, maximize, and close buttons
 ,
you can select View / Window Tabs / No Window Tabs. With this option, windows can be moved and resized inside of the main Morpheus Photo Compressor window.
There is also the View / Window Tabs / With Regular Windows option, which will use regular windows with the minimize, maximize, and close buttons,
but it will also have a tab bar showing all open windows. This hybrid option does not allow tabs to be grouped like the default option.
,
you can select View / Window Tabs / No Window Tabs. With this option, windows can be moved and resized inside of the main Morpheus Photo Compressor window.
There is also the View / Window Tabs / With Regular Windows option, which will use regular windows with the minimize, maximize, and close buttons,
but it will also have a tab bar showing all open windows. This hybrid option does not allow tabs to be grouped like the default option.
When using the View / Window Tabs / With Tab Groups mode, which is the default, Arrange Icons and Windows option for the window manager will not be
available under the Window menu, because with the tab groups, all windows are always maximized. Tile Horizontally and Tile Vertically will function
to set each open window into its own group, while Cascade will place all open windows into one single group. You can still select a window for focus
from the Window menu, but clicking on the tabs in the tab bar has the same effect.
The Windows skin can be changed by selecting a different skin from View / Skin. There are several varieties of skins to choose from, including a basic
one to use the native OS style instead. The functionality of the program is not affected by the skins, although some skins may have less visual
cues for hovering or dragging effects.
[top]
Many things that can be done in Morpheus Photo Compressor by using the mouse can also be done with keyboard shortcuts
or other alternative methods.
| Ctrl+O |
Open a new picture |
| Ctrl+S |
Save a copy of a picture |
| O |
View Original Image |
| R |
View Resized Image |
| C |
View Compressed Image |
| D |
View Difference Image |
| Q |
View Quality Graph |
| F1 |
Show help pane |
| Alt+Down Arrow |
Decrease JPEG quality |
| Alt+Up Arrow |
Increase JPEG quality |
| Alt+Left |
Decrease picture size |
| Alt+Right |
Increase picture size |
| Alt+S |
Jump to Size edit box |
| Alt+I |
Jump to Width edit box |
| Alt+T |
Jump to Height edit box |
| Alt+Q |
Jump to Quality edit box |
| Alt+M |
Email Picture |
| Alt+A |
Email All Pictures |
[top]
Please run through the tutorial
and read the FAQ
that come included with Morpheus Photo Compressor.
If you have come to this point and still have questions or would like to suggest a feature, feel free to
visit our support forums
and we will do our best to assist you in making your experience with Morpheus Photo Compressor a great one.
Thank you for using Morpheus Photo Compressor.
[top]
 17. Additional Help